We moved, and I know you all are anxious to see pics of the new house and all that... but there was something important I needed to do before we left the town home behind. Something I promised you years ago and never followed through on.
Sam's room was my favorite room in that house. I put a ton of effort and thought into making that room special, and before we left it for good, I really want to document it and share it with you-- in it's complete form.
Before I packed a single thing in that room, we gave it a good clean and pick-up and then took pictures so we would always have documentation and something to remember Sam's first room. The room we brought him home from the hospital to. The room where we spent countless hours rocking, feeding, playing, reading, and growing up. It was the only thing about the old house that I had a bittersweet pang leaving. But here it is, for you-- but mostly for me-- to enjoy and for posterity.
This is the view looking in the door. The chair is a rocking overstuffed chair we purchased at Babies 'R' Us. (Talked about our purchase here). The curtains were made by me. Bobble throw on the chair was made and given to us by my good friend Amy Lee. The P pillow a gift from another friend. White shag rug from target. Trunk has been mine for years. And the bureau is part of the furniture I refinished for the room. The awesome bear painting on top of the bureau was a gift painted by my Aunt. (It is SO COOL.) The letters spelling his name came from HomeGoods.
The crib was purchase at Nebraska Furniture Mart. Bed sheet (white with green polka dots) and the crib skirt were made by me. The chevron quilt I made for him is over the side of the crib. The three small canvases above the bed were taken by Kim Joyce Photography, and the canvases purchased from ArtsCow.com. The corner shelves are from Target. We have an AngelCare monitor (on the right) that we LOVE. Blocks that spell Samuel (corner shelf on the left) are from Little Sapling Toys. The leaf mobile above the crib was made by myself and my friend, of etsy inspiration. To the right of the crib is Sam's hamper, and in the top middle of the photo you can see a little 'sweet pea' ornament that my mom gave us, we hung it from the fan pull, and it became part of Sam's goodnight ritual, touching the sweetpea before bed every night.
This dresser was another piece that I refinished for the room. The changing pad was purchased from Babies 'R' Us, and the changing pad cover I made. The elephant lamp on the right was purchased at HomeGoods, and Amy Lee and I recovered the lampshade. Peeking around the corner (on the floor on the left) you can see the bag holder I made, and also the wet bags for Sam's cloth diapers hang there. Above the dresser is the tiled round miror I purchase at HomeGoods, as well as pictures of Z and I, the puppies, sam's sonogram and framed hospital bracelet. Above the changing pad as pinwheels from the Baby P shower my friend Erin threw. Sam loved those hanging pinwheels!
The view from the other side of the room... My favorite part! Sam had a regular old boring closet that was dingy and had broken sliding doors on it. We removed the doors and painted it this happy bright green color. My dad built the shelf going up the middle, and I painted that and all the other shelving (going up the sides of the closet you can't see) a bright shiny white. We installed the wooden clothing rods. The green tubs along the top shelf and the green kids hangers came from Target. We added a ton of storage, and made the room feel more open bright with out closet remodel. I was so happy. The large ruler to the left of the closet I made as a growth chart for Sam's first birthday. (Meant to put that project on the blog, but... oops.)
And I think that's about it. If you saw anything in there I didn't mention that you are curious about, please ask, I will answer to the best of my ability! I was so proud of this room, and felt so happy in this space.
Goodbye, Happy Room! We will miss you, but we gotta move on to bigger and better things!
It's a little weird to go back through all those older posts as we were preparing this room for Little Sam... especially since we now have a Baby P II we are preparing for. Oh, we have Big plans for his first little room! I can't wait to get started and share with you along the way. :)
Showing posts with label baby space. Show all posts
Wednesday, August 14, 2013
Tuesday, August 7, 2012
Prints for Sam's Room
This week I have been doing a few things I meant to do... eight months ago? (Is it possible the boy is almost eight months??? Yikes!) I am finishing up Sam's room.
I mean, everything was in place when he arrived, but there were a few details, like... things on the walls and empty frames that needed to be filled. And I finally said enough is enough. I've gotta make this happen.
One of the things I wanted to do was a make a few prints for his room with some special verses and cute sayings, etc. I've been wanting to try my hand at some text printables, but never really got around to it. But yesterday my son took a THREE HOUR NAP (!!!!!!) and after doing dishes, laundry, and sitting by myself, watching an old episode of the office uninterupted, just for funsies... i went, huh. now what? And I sat down at the computer and created something.
Would you believe... just as it was complete and I was pushing the SAVE button I heard the first little whimpers from the monitor meaning my munchkin had awakened. How's that for timing?
The first one is a blessing/song that my family has been singing for years. I used to attend early morning practices for the elite high school choir when I was in 3rd and 4th grade. My mother was the accompanist and I sat at the piano bench through all their rehearsals and listened and learned. I remember the first time I heard this song and I thought the music and the text were beautiful. When I was in college the choir I was in sang the same song at the end of every concert, and I loved it. So this blessing has been special to me for a very long time. I have prayed this over my little boy so many nights as he sleeps peacefully. I hope he'll grow up with a special place for this text in his life too.
This morning when I woke up at 7:00 everyone else was still sound asleep. So I snuck downstairs to have my coffee in peace, and started working on a second print for Sam's room. This one is also a scripture-- but a little bit tongue in cheek. One thing that Z especially hates is when people take scripture out of context and use it to mean something it doesn't. So I told him I was making prints with questionable scriptural context for Sam's walls... and he started to get all leary.
I mean, everything was in place when he arrived, but there were a few details, like... things on the walls and empty frames that needed to be filled. And I finally said enough is enough. I've gotta make this happen.
One of the things I wanted to do was a make a few prints for his room with some special verses and cute sayings, etc. I've been wanting to try my hand at some text printables, but never really got around to it. But yesterday my son took a THREE HOUR NAP (!!!!!!) and after doing dishes, laundry, and sitting by myself, watching an old episode of the office uninterupted, just for funsies... i went, huh. now what? And I sat down at the computer and created something.
Would you believe... just as it was complete and I was pushing the SAVE button I heard the first little whimpers from the monitor meaning my munchkin had awakened. How's that for timing?
The first one is a blessing/song that my family has been singing for years. I used to attend early morning practices for the elite high school choir when I was in 3rd and 4th grade. My mother was the accompanist and I sat at the piano bench through all their rehearsals and listened and learned. I remember the first time I heard this song and I thought the music and the text were beautiful. When I was in college the choir I was in sang the same song at the end of every concert, and I loved it. So this blessing has been special to me for a very long time. I have prayed this over my little boy so many nights as he sleeps peacefully. I hope he'll grow up with a special place for this text in his life too.
This morning when I woke up at 7:00 everyone else was still sound asleep. So I snuck downstairs to have my coffee in peace, and started working on a second print for Sam's room. This one is also a scripture-- but a little bit tongue in cheek. One thing that Z especially hates is when people take scripture out of context and use it to mean something it doesn't. So I told him I was making prints with questionable scriptural context for Sam's walls... and he started to get all leary.
Then I showed him the second print, and he laughed and said-- that's actually pretty funny. The second one will be hung in the collage above Sam's changing table, so it's fitting. And it just makes me giggle.
I have a couple nice frames with matts that have been sitting in my basement for a couple years ready for these little gems. I am off to the printer today to have them printed up!
(If you would be interested in having a copy of one or both of these prints, let me know and I would be happy to email you original files!)
Labels:
baby space,
printable
Thursday, November 17, 2011
Changing Pad Cover
Here is another project from Baby P's room.
If you remember from Baby P's Furniture post, we decided to use what we had, as opposed to buying new furniture for the room. So we will be using the dresser as a changing table. We just had to get a pad for the top, and it actually works out pretty great because there is plenty of space in drawers below to hold diapering essentials.
(find out more after the jump!)
If you remember from Baby P's Furniture post, we decided to use what we had, as opposed to buying new furniture for the room. So we will be using the dresser as a changing table. We just had to get a pad for the top, and it actually works out pretty great because there is plenty of space in drawers below to hold diapering essentials.
(find out more after the jump!)
Thursday, November 10, 2011
Curtain-y Goodness!
You didn't think it was going to happen, did you? You were trying hard to believe my claims that there were actually curtains made... but the lack of blogged evidence made you doubt, didn't it? Well, guess what... the long-awaited curtains post is here!
This curtain project started a looooooong time ago. It was one of the first projects I tackled, actually. It just hit a big delay.
When I started my nursery project I discussed budget and inspiration here. I knew I wanted BIG panel curtains, but I knew I needed to get them for CHEAP. And that wasn't going to be easy. Erin and I went to a fabric outlet store in hopes of finding something fabulous and cheap... and we actually found several options, though I am indecisive and left empty handed. We found this lovely, bold, geometric pattern in black and white-- and I loved it. It was 8.99/yd which is pretty darn reasonable for the heavy interior (possible upholstery weight?) fabric that it was... but I was needing 6.5 yds for my drapes... and that would put me at around $60 in fabric... which isn't extravagant, but I was hoping to keep it under $50. There was another fabric that I didn't know for sure if I LOVED... but it was much cheaper and had the perfect shade of green, but a deeper shade of blue than I wanted. And it was a very subtle 'texture' rather than bold print like i was envisioning...
But I went for it, because it was in pile marked-- get this-- $2/yd. It was worth the risk of not loving it in the room when they rolled over 7 yards of the stuff for fourteen bucks. I felt good about that purchase.So I got it in the room, and guess what???
I didn't love it.
Sigh. I was frustrated with myself for not loving it... but it wasn't singing to my soul, and I needed a song. After staring and sighing at that big roll of fabric for a few days I made the decision that since I only had $14 invested in these curtains I could go ahead and slap them together, then replace them at a later date when I did find something that made my heart sing.So I went to Target (you know, God's store...) to buy some hardware. I opted for a brushed nickle (to match the hardware on the the dresser) rod and curtain clips. So I could make simple panels and clip them up without worrying about pockets or tabs or whatever. Walking through the aisles at target I passed the sheets and found some lovely green ones... the PERFECT shade of green, actually. And all of a sudden inspiration hit, and I had an idea that might make my unhappy curtains a bit more song-worthy.
Time to get started... I used this tutorial for making professional drapes and this tutorial explaining a blind hem stitch and this curtain post as inspiration for size and style and installation. Armed with all that info... I set out to make me some curtains.
My finished product was to be 90 inch panels, so to allow my self plenty of 'mistake' room and a large bottom hem... I cut two panels 100 inches each. Then I cut 2 pieces of the green fabric the width of the panel and 20" in length. I serged and ironed those green pieces well.
To attach my green... I measured 18 inches from the top of the panel and pinned down the green. right sides of fabric together.
At the top of the panel, my green accent piece was now longer than my curtain panel. I ironed that hem under and sewed it down for a nice pretty finished hem. Yay.
And that created a green accent for the top of the panel curtains. Looks like this hung up:
To finish the curtains I used that newly learned blind hem skill to finish off all the edges...
| (Super excited/proud of this new skill) |
(You'll notice I decided not to line these curtains. The fabric was already a heavy weight and we do have blinds on the windows to block light and make it nice and dark in there... so I didn't think it would need extra light blocking power... plus... I am on a budget here, remember? I was too cheap to spend extra money on lining. Don't judge me.)
And from here... we sat for about a month while I tried to convince the husband to fix the curtain rod. It wasn't anchored correctly when we first put it in, and the weight of just one of the panels as I was trying to hang it pulled it out of the drywall. Oops. So he finally got some heavy duty drywall anchors and got that puppy SOLID. Seriously, I could trapeze from that curtain rod now.
I put a nice deep hem in the bottom (about 5 inches...) and they were ready to be hung!
I already had this info on my radar, but recently found this picture which is an excellent visual illustration about hanging curtains:
High and wide! It plays tricks on your mind and makes your window look bigger and grander. (Grander? Is that a word???) Which we definitely needed with this puny thing in our baby room:
But with the curtains up, the same window looks bigger and more balanced on that wall...
(I know what you are thinking... I could have gone higher/wider, huh?)
But the curtains are officially up, and guess what?
I LOVE them now.
They make my heart sing that happy tune I was hoping for. They are not punch you in the face statement curtains... but simple and nice and just the right ease for the room. I am happy. And happy one more project is complete. Yay.
Labels:
Baby P,
baby space,
curtains,
decor,
sewing
Thursday, October 27, 2011
Drawers all lined up!
Mama P has been oh-so-busy with more projects for Baby P's room. This one is --GASP!-- a non-sewing project!!! I'll give you a moment to recover while you gaze upon lined drawer furniture loveliness...
Labels:
Baby P,
baby space,
DIY,
Drawer liner,
furniture
Monday, October 24, 2011
The Black Hole
So I was looking for a really fun lamp for my kiddo's room. I loved this cute little lamp:
but while I adored it, the price tag was too much for me. Sigh.
So I set out to find something just as fun, but maybe a bit cheaper. A few weeks later my friend Amy Lee found and pinned this little lamp she found on pinterest:
Which I loved... until i clicked through to discover the price on that lamp was nearly $400! Holy cow. Not headed in the right direction here with the price tag. But what a bummer, it's a cute lamp.
A few days later I was shopping at HomeGoods (man, I love that store!) and found this...
For a tiny fraction of the price of that super expensive, though quite similar other elephant lamp. SCORE. But here's the problem...
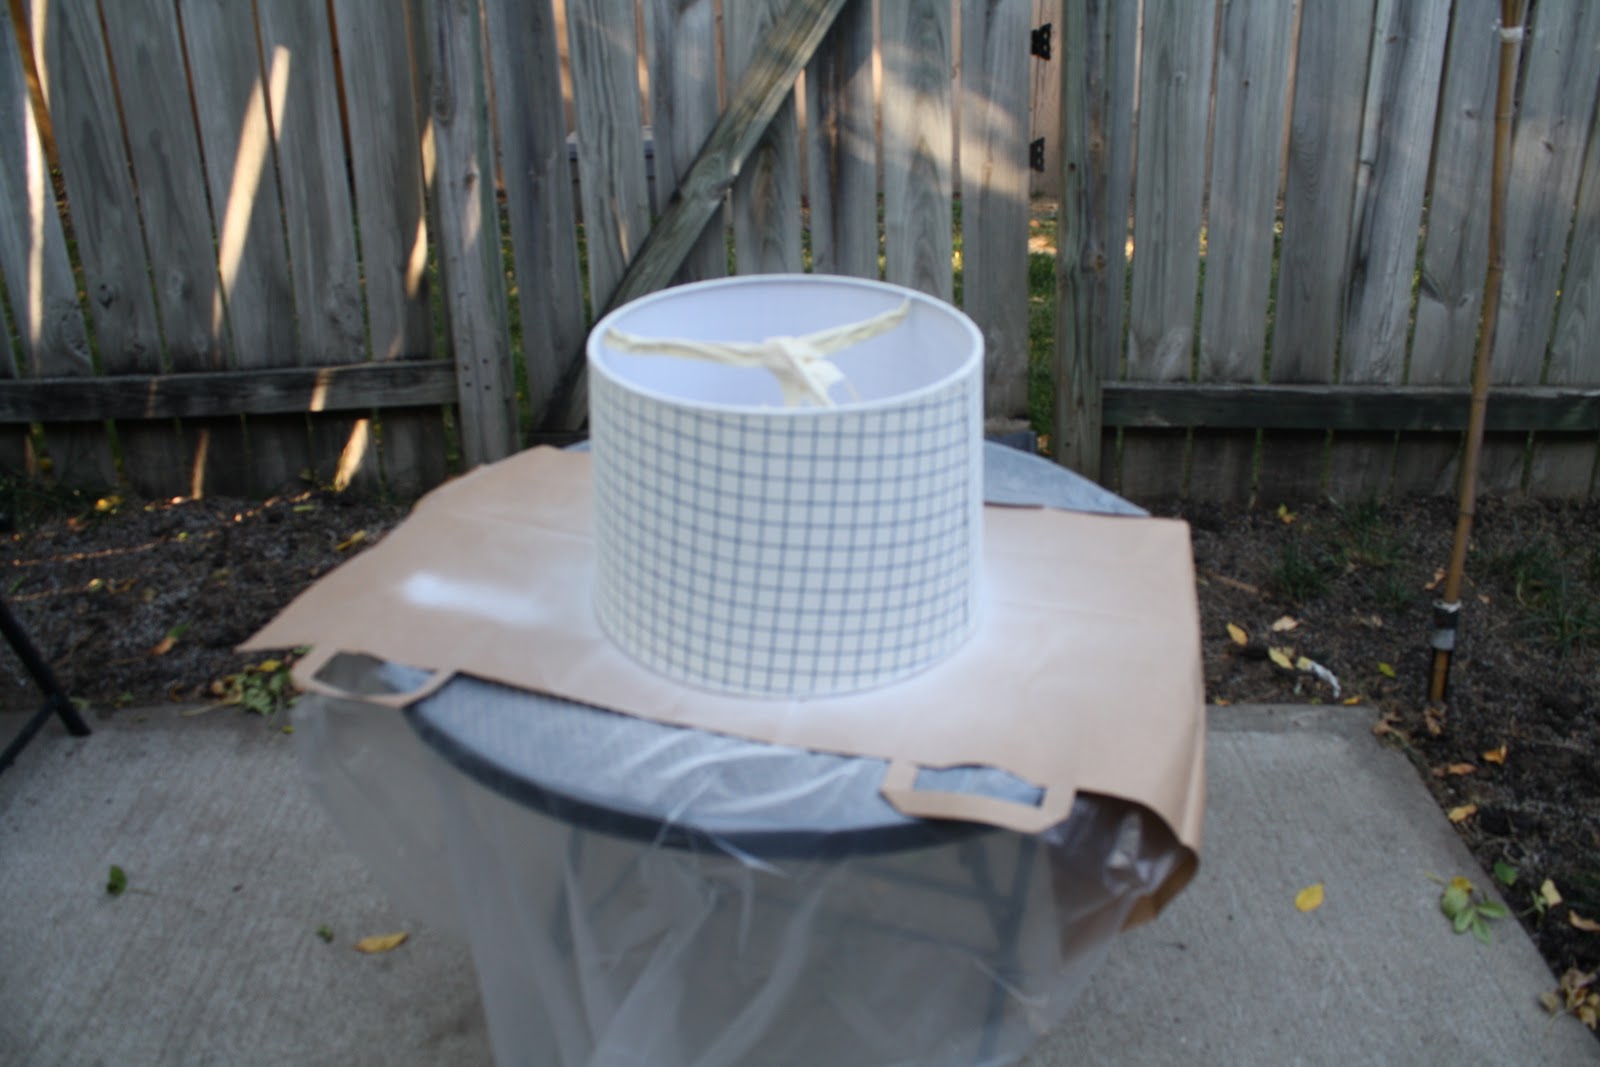
Wah-wah... hey there ugly royal blue gingham lamp shade. You are not really my style. Fear not, I shall change you! Should be easy.
HA.
Plan A: was to cover it with fabric. But I looked and looked for a simple/subtle print to cover the lampshade with, and no luck. I just couldn't find anything I liked. I considered just a solid white shade like the one in the other lamp. But did want to buy one. Soooo...
Plan B: I'm going to paint that lamp shade. I got some white spray paint, and some light green that I was going to paint subtle chevrons on the white. It was going to be great. Step one, remove the trim and tape off the hardware:
but while I adored it, the price tag was too much for me. Sigh.
So I set out to find something just as fun, but maybe a bit cheaper. A few weeks later my friend Amy Lee found and pinned this little lamp she found on pinterest:
Which I loved... until i clicked through to discover the price on that lamp was nearly $400! Holy cow. Not headed in the right direction here with the price tag. But what a bummer, it's a cute lamp.
A few days later I was shopping at HomeGoods (man, I love that store!) and found this...
For a tiny fraction of the price of that super expensive, though quite similar other elephant lamp. SCORE. But here's the problem...
Wah-wah... hey there ugly royal blue gingham lamp shade. You are not really my style. Fear not, I shall change you! Should be easy.
HA.
Plan A: was to cover it with fabric. But I looked and looked for a simple/subtle print to cover the lampshade with, and no luck. I just couldn't find anything I liked. I considered just a solid white shade like the one in the other lamp. But did want to buy one. Soooo...
Plan B: I'm going to paint that lamp shade. I got some white spray paint, and some light green that I was going to paint subtle chevrons on the white. It was going to be great. Step one, remove the trim and tape off the hardware:
Next, I decided it couldn't hurt to spray it with some primer I had on hand-- better coverage right? So here is is after 3 coats of spray primer:
Oh.... hey. You can't really tell I painted anything cane you? After using up the rest of my can of primer on this thing, I put down two coats of white spray paint... and it looked about the same. This thing was like trying to paint a black hole. I don't know what happened to it, but any paint sent it's direction was sucked into an abyss never to be seen again. Soooo... plan B.5 I got some white exterior latex paint and brushed it on. nice and thick. once it was dry... still blue gingham. Spray on 3 more coats of white spray paint... still bright blue gingham.
UUUUUURRRRRRRRRGGGGGGHHHHHHH!
So I gave up on it. Stupid black hole lamp shade. It was feeling rather crusty at this point anyhow, and I was mad.
Then Amy Lee came over for our crafty night (remember when we made this?) and she convinced me it wasn't hopeless. We sat on the floor draping it with various fabrics and debating cutting the whole thing in pieces. She pulled some leftover quilt fabric out of a bag... and draped it accross the gingham, and we both went... huh.
Because it was white. Just like the original elephant lamp. And we liked it.
We... didn't take pictures because it was quite late and we were delirious and anxious to get the project done. But... we used a spray adhesive to attach the fabric then trimmed the extra off... (you can google 'covering a lampshade' and get hundreds of results and tutorials if you need more instruction than that... I'll leave that up to you.) Then, to break up the white--just a tiny bit-- we made a bias tape out of the same green fabric I used for the curtains and glued it around the top:
Don't ask me why this is the only picture I took of the entire process.
Well, actually, that's a lie. I also took this picture:
(Remember how I said it was well after midnight... ??? You knew a whole post about lampshades was going to include at least one reference to a lampshade on someone's head, right?)
Once complete we took it upstairs and installed it on the lamp and...We love it! I love that it's white... but the white on white pattern is subtle and lovely. Yay yay yay!
Thank you Amy Lee for your help. Baby P's lamp is perfect... and the perfect addition to his room! :)
Labels:
Baby P,
baby space,
lamp shade
Wednesday, October 12, 2011
The Crib!
The... final piece of furniture was added to Baby P's room a couple weeks ago. I meant to show you then, but was in the middle of the Pinterest Challenge, and in the midst of all that posting it got away from me.
I know to most of you, a crib is a crib, so yay for us we have one. But I am still quite excited about it. Also, it's good just to have another piece of the puzzle in place. It's really starting to feel like we are 'ready' for Baby P. (though ready is in quotes because... can one ever be ready for their first child???)
Anywho before the crib showed up the back wall of Baby P's room was looking a little empty:
I know to most of you, a crib is a crib, so yay for us we have one. But I am still quite excited about it. Also, it's good just to have another piece of the puzzle in place. It's really starting to feel like we are 'ready' for Baby P. (though ready is in quotes because... can one ever be ready for their first child???)
Anywho before the crib showed up the back wall of Baby P's room was looking a little empty:
But now it looks like this:
Ooh, pretty. (Bonus, you can see Winston ears in the bottom left of this pic... that dog loves this room, and especially that rug. Probably because it is mostly off limits to him.) The crib is lovely and matches the refinished furniture quite well. I am pleased. I like the shape of it, traditional, clean with a little bit of flair... also it's the convertible kind, came with rails to turn into a toddler bed, and eventually full size bed. So we are planning on this being furniture our kiddo can grow with.We also procured a mattress for our crib (organic cotton fill, because I am getting all crazy like that!) that fits snugly inside... and one evening on a sewing date night with my mama, we used this crib sheet tutorial to make a couple of fitted sheets for the bed.
They were quite easy to whip up in a few minutes and fit the bed perfectly. I love that I could pick my own fabrics in colors and prints that match his room. He has a green polka dot (shown) a blue sprinkle sheet, and a green striped flannel sheet that is so soft and warm. Quite pleased with that simple project.
So there you have it. The last big piece of furniture in Baby P's room. It's starting to really come together now. We are getting excited! Lots more Baby P room projects coming soon, but this week... I am working my fingers off to complete a few baby quilts for the grandmas before a certain Baby P's shower on Sunday. Wish me luck!
Labels:
Baby P,
baby space,
furniture
Thursday, September 29, 2011
Pinterest Challenge: Project #3
This is... sort of an incomplete project.
It all started with my chevron rug obsession for Baby P's room. When I decided a rug would be too much for his room... and I saw this on pinterest:
I knew what to do. I was going to make a chevron quilt for my baby. But I wanted it black and white. Can you make a black and white baby quilt? Grandma Sass would say adamantly, NO. But I say... why not? Aren't babies supposed to be stimulated by black and white patterns or something?
Yeah, I've totally been reading my baby books, can you tell? Someone is a prepared mama.
But back to the quilt... I tried to figure out if straight black and white would be too boring? (it would.)
I didn't want to add a lot of color/print (mostly because I didn't want to pick something out, and i wanted high contrast) but when I was at the fabric store I found this white on white print with different size dots on it... they looked like bubbles, I loved it... but they didn't have enough of it, AND it was stained on top of that. UGH. So I settled for a small white on white dot print that was similar. I bought my black and I was ready to go.
So here are all 126 blocks cut out and stacked up ready to be laid out. I laid it out across the bed in the basement/spare bedroom. It was bigger than I thought it would be. My husband came home and said, whoa did you mean for it to be that big? My mom came over and said, whoa, did you mean for it to be that big? No... I guess I didn't know how big it would be. The pattern said crib size which I was assuming was the yard-point-five-ish size blankets my grandma always made, but I guess crib size is 45x60 in case you were wondering and that's big.
Here's a close up so you can see the different dot patterns (and not judge my 'slightly off' row there toward the top... or the fact that it's kinda wrinkly, but, hey once it's quilted you want it to wrinkle anyhow, right?)
It all started with my chevron rug obsession for Baby P's room. When I decided a rug would be too much for his room... and I saw this on pinterest:
I knew what to do. I was going to make a chevron quilt for my baby. But I wanted it black and white. Can you make a black and white baby quilt? Grandma Sass would say adamantly, NO. But I say... why not? Aren't babies supposed to be stimulated by black and white patterns or something?
Yeah, I've totally been reading my baby books, can you tell? Someone is a prepared mama.
But back to the quilt... I tried to figure out if straight black and white would be too boring? (it would.)
I didn't want to add a lot of color/print (mostly because I didn't want to pick something out, and i wanted high contrast) but when I was at the fabric store I found this white on white print with different size dots on it... they looked like bubbles, I loved it... but they didn't have enough of it, AND it was stained on top of that. UGH. So I settled for a small white on white dot print that was similar. I bought my black and I was ready to go.
I have to admit, this project made me really nervous. Even though I have a couple baby quilts under my belt, the only time I have pieced together a quilt top like this was with my grandma, who passed away almost two years ago now. I was a little bit scared about my skill level in completing the process... but also about my emotional level. It took me a few days to power through it, I am not going to lie, I stopped for a cry break once or twice (but that could also be prego hormone related, who knows?). But I had Granny's cutting mat and quilt square/ruler things... so I felt confident. :)
Once I was home and cutting a million little squares I was all, "Meh, this is boring" UGH. Too much little dot going on, needed more interest. So I went to a DIFFERENT fabric store where I found some large white on white polka dots. Perfect!
So here are all 126 blocks cut out and stacked up ready to be laid out. I laid it out across the bed in the basement/spare bedroom. It was bigger than I thought it would be. My husband came home and said, whoa did you mean for it to be that big? My mom came over and said, whoa, did you mean for it to be that big? No... I guess I didn't know how big it would be. The pattern said crib size which I was assuming was the yard-point-five-ish size blankets my grandma always made, but I guess crib size is 45x60 in case you were wondering and that's big.
My mom came over for our weekly date, and she quilted away on her Baby P quilt, and I worked on mine. Oh, man, I love my serger. I was flying through this thing. I don't know what the official stance is for quilters and sergers vs. sewing... but the serger was awesome and FAST. And I am all for awesome and fast. Plus, Granny made all her quilts with a serger... so if I am doing it wrong, I'm doing it wrong like Grandma! (And I am totally okay with that.)
Then, because this was done on point, I had all these little triangles to trim off the edges. (And the trimmed portions were just like bunting, Erin, you would have been so excited! :) haha) And my mom insisted on including me in the pic, because she is all... you will want pictures of you working on your baby's quilt someday for the memories, and I am all... but won't I have the quilt for the memories? Anyway, here's a pic of good ol' prego me cutting away. Yay. (and please try to ignore the unmade bed-- it was holding the quilt pieces-- and the laundry in the background.)
And... then I had a quilt top! Which is as far as this post is going to take you, because that's as far as my pinterest inspiration/tutorial took me.
Soooooo... now all I have to do is figure out how I want to quilt the thing (anyone experienced have suggestions? I don't think I want to do stippling... I am still undecided about what to do.)
Anywho... there is the top for Baby P's Chevron quilt from Mama! I will, of course, post pictures when it is fully complete.
Pinterest Challenge #3? Check!
And be sure to check out the rest of the Pinterest Challenge projects and Amy Lee, Erin, Jessica and Stacia... some of them I have featured, some of them just keep posting more and more great stuff on their blogs! Awesome, no?
Labels:
baby,
Baby P,
baby space,
pinterest,
pinterest challenge,
quilt
Thursday, September 22, 2011
The Dirty Laundry
(Still no curtains to show you. They are done... ish. I just need to take pics to show you. Be patient with me... I'm a wild woman in full 'nesting mode'. And I have about 14 projects going right now. Maybe not the best plan... hmmm...)
No, I am not airing our dirty laundry and personal secrets on my crafty blog today-- if you want that kind of juicy info, you have to read the other blog... har har. Okay, it's not that juicy either, but I do make fun of my husband quite a bit, for which there is a grassroots sect of Valerie's-blog-following-Zach-sympathizers who feel quite bad for him. Which actually works out kinda well, because if someone else is taking the time to feel bad for Z then I don't have to... and I can spend my time doing more exciting things like making stuff for my baby! Yay! Anywho... what was I talking about?
Oh, Laundry.
So Baby P needed a hamper. And in my head I wanted a tallish woven basket-like hamper with a lid similar to the one we have. Only we got ours as a wedding gift, so I didn't really know how much one would have to invest in such an item. I was thinking like... $15-20 ish sounded reasonable.
Something along these lines... only... no matter where I looked, I couldn't find anything for under $50. UGH. Are you for reals? I'm not paying $50 for a laundry hamper. I checked all my usual spots... thrift stores, HomeGoods, BBB, Online... nothing. I was gonna be out $50 if I wanted a woven basket. Those basket making bums that over charge for their junk! Then the other day I was bopping past the baskets at Hobby Lobby on my way to the front and thought... hmmmm... sure enough, The Lob had tall hamper style baskets. For... $30-40. Meh, it was better, still more than I wanted to pay... but wait! It was 40% off coupon week at The Lob, and I just so happened to have in my possession one of those happy pieces of paper... It was my golden ticket. So I bit the bullet and got it. Yay.
It was all chunky and woody and woven and all the right colors for the room... and it already came with a liner...
And ugly brown swirly liner thing.
That I decided to spare you a picture of.
But which was promptly used as a pattern to make this happy green one:
Have you...
Been working on your Pinterest Challenge? If you were one of the lovely ladies who said you would participate, I am going to harass you sometime in the next week, just to make sure you do something! :) If you wanna show off your project, or want me to show off your project send me a link and or pictures, cool? Cool. You're the best!
No, I am not airing our dirty laundry and personal secrets on my crafty blog today-- if you want that kind of juicy info, you have to read the other blog... har har. Okay, it's not that juicy either, but I do make fun of my husband quite a bit, for which there is a grassroots sect of Valerie's-blog-following-Zach-sympathizers who feel quite bad for him. Which actually works out kinda well, because if someone else is taking the time to feel bad for Z then I don't have to... and I can spend my time doing more exciting things like making stuff for my baby! Yay! Anywho... what was I talking about?
Oh, Laundry.
So Baby P needed a hamper. And in my head I wanted a tallish woven basket-like hamper with a lid similar to the one we have. Only we got ours as a wedding gift, so I didn't really know how much one would have to invest in such an item. I was thinking like... $15-20 ish sounded reasonable.
Something along these lines... only... no matter where I looked, I couldn't find anything for under $50. UGH. Are you for reals? I'm not paying $50 for a laundry hamper. I checked all my usual spots... thrift stores, HomeGoods, BBB, Online... nothing. I was gonna be out $50 if I wanted a woven basket. Those basket making bums that over charge for their junk! Then the other day I was bopping past the baskets at Hobby Lobby on my way to the front and thought... hmmmm... sure enough, The Lob had tall hamper style baskets. For... $30-40. Meh, it was better, still more than I wanted to pay... but wait! It was 40% off coupon week at The Lob, and I just so happened to have in my possession one of those happy pieces of paper... It was my golden ticket. So I bit the bullet and got it. Yay.
It was all chunky and woody and woven and all the right colors for the room... and it already came with a liner...
And ugly brown swirly liner thing.
That I decided to spare you a picture of.
But which was promptly used as a pattern to make this happy green one:
I used the same green fabric that you will also see in the curtains, and on some throw pillows. I was going to make another crib sheet out of this, but my mom was helping me and cut the hamper liner out of the wrong chunk of fabric, so now I don't have enough for a sheet. Oh well. We've got plenty of it going on already.
It's just a simple drawstring bag that I serged together super quick...
Not a life-changing addition to the room, but one I am quite pleased with. Now we have a place to throw all those tiny, dirty, stinky outfits our little one will enjoy soiling regularly. (I hear they can go through several a day, which means our kid will be rivaling his mom for the wardrobe high-maintenance crown... and I am not sure how I feel about that) I popped it back in the corner between the bed and the dresser... eventually our wetbags for diapers will be hanging in that corner as well. You know, once we get them. (Seriously, did you go to that link? How cute are those wet bags? You know I am not a bird person, but I think that print is precious and perfect for our little room! Yay. who knew a wetbag would get me so excited? Life is weird these days.)
And... because slapping together a quick liner for a basket doesn't seem life changing enough to account for the silence on the blog this week, just thought I would show you all this picture...
Because these stacks of fabric blocks are what I have REALLY been working on all week. More progress on that soon... because tonight is Mama night! My Mama has been coming over once a week to help me clean/sew/nest/prep for Baby P. It's so fun to spend time with her. I love my mama! Hopefully we will get a lot done tonight. :)Have you...
Been working on your Pinterest Challenge? If you were one of the lovely ladies who said you would participate, I am going to harass you sometime in the next week, just to make sure you do something! :) If you wanna show off your project, or want me to show off your project send me a link and or pictures, cool? Cool. You're the best!
Labels:
Baby P,
baby space,
Laundry,
sewing
Friday, September 16, 2011
Ambiance
I like to pronounce it Ahhm-bee-ahhns... because it makes me feel fancy.
Fancy like the new fancy fan and lighting we have going on in Baby P's room now.
Not that the previous light and fan (lacking in the fancy department) posed some kind of risk or was not doing it's job... but for some reason Z and my dad got on this... "we need to replace that fan STAT" kick. Okay, in their defense, it was a smidge noisy, but I still think we could have balanced it and not completely blown my room budget out the window when we flipped the switch on the new fan.
Actually... that's a totally inaccurate (though thoughtfully penned, no?) statement, as the new fan doesn't even have a switch. It has a this:
That would be a fancy spaceship controller that changes the speed of the fan AND makes the lights dim. This was an essential addition to the whole new fan set up. Z wired it all in himself and was quite proud. It's also a remote that pops out of it's little holder there where the light switch previously was... so I guess if you want to turn off the light fro the other side of the room... you are welcome to take it with you and do so. Which would probably be more convenient if the room weren't so tiny.
So here's the new fancy fan:
(Can we just have a quick discussion about how annoyingly hard it is to take decent pics of a lit light fixture? Yeah... annoying. And hard. Okay.) I liked this fan because of the enclosed ceiling mount. I thought it looked a little more modern and a little more substantial-- even though is was kind of a mid-range quality/priced fan. I liked the squarish blades, and I like that when Baby P is chillin' on the comfy, fluffy rug on his floor, he can admire his modern asterisk shaped fan. (I am assuming he will share my appreciation for typography in design elements.)
(For the sake of full disclosure: Yes, I laid on my back on the floor to take this picture. I wanted to get the Baby P view. My husband wasn't home, and after lowering myself to the floor on my back I panicked because I was pretty sure I would never be able to get up on my own. Hindsight can suck it. I attempted to roll to my side and scoot across the rug to a piece of furniture to help prop me up... but twisted into a funny shape that caused angry nerve receptors to shoot lightening bolts through my abdomen and back. I started yelping... and my white dogs stood in the doorway with their heads tilted the same direction and expressions that read: You pitifully stupid creature, what did you THINK was going to happen??? But I finally pulled myself into an upright position again, and everyone survived the experience. All for the blog, my friends, and all for you.)
(Also, valuable lesson learned here: Have the husband take the 'Baby veiw' shots from now on.)
I wish I had a picture of the ugly fan we replaced, so you could be all, Oh, WOW. That IS such an improvement... but ugly fan pics got lost in the computer crash earlier this week (along with the pics of my handsome husband actually installing it on his own... he smiled and everything for the picture. It was charming and priceless, and now it is gone. Pout.) so you will have to imagine an ugly, dirty, builder's grade fan on our ceiling. Did you imagine it? Go ahead, do it. I'll wait...
...
...
See, now, isn't that an improvement? Now that the room has ambient lighting and quietly moving air and remote controls... we are ready to move on to other more DIY-y projects.
(Bonus: if you are clever and observant you have seen a sneak peek of the wall color in several of the last baby room posts... It's seriously the prettiest color EVAR. It makes my happy! Can't wait to show you more.)
Fancy like the new fancy fan and lighting we have going on in Baby P's room now.
Not that the previous light and fan (lacking in the fancy department) posed some kind of risk or was not doing it's job... but for some reason Z and my dad got on this... "we need to replace that fan STAT" kick. Okay, in their defense, it was a smidge noisy, but I still think we could have balanced it and not completely blown my room budget out the window when we flipped the switch on the new fan.
Actually... that's a totally inaccurate (though thoughtfully penned, no?) statement, as the new fan doesn't even have a switch. It has a this:
That would be a fancy spaceship controller that changes the speed of the fan AND makes the lights dim. This was an essential addition to the whole new fan set up. Z wired it all in himself and was quite proud. It's also a remote that pops out of it's little holder there where the light switch previously was... so I guess if you want to turn off the light fro the other side of the room... you are welcome to take it with you and do so. Which would probably be more convenient if the room weren't so tiny.
So here's the new fancy fan:
| All lit up full and bright... |
| Dimmed down low for ambiance |
(Can we just have a quick discussion about how annoyingly hard it is to take decent pics of a lit light fixture? Yeah... annoying. And hard. Okay.) I liked this fan because of the enclosed ceiling mount. I thought it looked a little more modern and a little more substantial-- even though is was kind of a mid-range quality/priced fan. I liked the squarish blades, and I like that when Baby P is chillin' on the comfy, fluffy rug on his floor, he can admire his modern asterisk shaped fan. (I am assuming he will share my appreciation for typography in design elements.)
(For the sake of full disclosure: Yes, I laid on my back on the floor to take this picture. I wanted to get the Baby P view. My husband wasn't home, and after lowering myself to the floor on my back I panicked because I was pretty sure I would never be able to get up on my own. Hindsight can suck it. I attempted to roll to my side and scoot across the rug to a piece of furniture to help prop me up... but twisted into a funny shape that caused angry nerve receptors to shoot lightening bolts through my abdomen and back. I started yelping... and my white dogs stood in the doorway with their heads tilted the same direction and expressions that read: You pitifully stupid creature, what did you THINK was going to happen??? But I finally pulled myself into an upright position again, and everyone survived the experience. All for the blog, my friends, and all for you.)
(Also, valuable lesson learned here: Have the husband take the 'Baby veiw' shots from now on.)
I wish I had a picture of the ugly fan we replaced, so you could be all, Oh, WOW. That IS such an improvement... but ugly fan pics got lost in the computer crash earlier this week (along with the pics of my handsome husband actually installing it on his own... he smiled and everything for the picture. It was charming and priceless, and now it is gone. Pout.) so you will have to imagine an ugly, dirty, builder's grade fan on our ceiling. Did you imagine it? Go ahead, do it. I'll wait...
...
...
See, now, isn't that an improvement? Now that the room has ambient lighting and quietly moving air and remote controls... we are ready to move on to other more DIY-y projects.
(Bonus: if you are clever and observant you have seen a sneak peek of the wall color in several of the last baby room posts... It's seriously the prettiest color EVAR. It makes my happy! Can't wait to show you more.)
Labels:
Baby P,
baby space,
DIY,
fan
Subscribe to:
Posts (Atom)