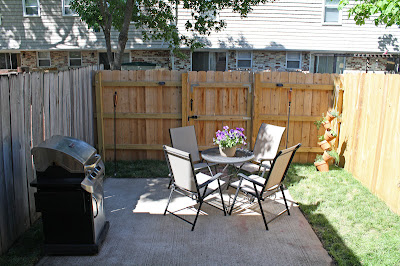
This is the part of the yard that is rarely photographed, and often pushed out of the way when it is. See that dirty plastic tub? Thats where we store our outside pillows, tiki torch fuel, bug candles, some funnels, random garden stuff, and grilling tools. It's kinda a junk drawer... but you know, the outside version. Then behind it are a couple rakes that just lean against the fence, because they have no where else to go. Also, recently our crumbling, needing to be thrown out tiki torches found a home there as well. And it was starting to look cluttered, dirty, and generally unappealing. And Z would comment on it every time we were in the yard.
I know! I would say, But where are we supposed to put that stuff? We don't really have room for it inside.
then the other day Z said... what if we put a cabinet or something up by the house, and we could make it tall enough to put rakes in.
Not a horrible idea... but first you need to see another rarely photographed view of our backyard:
We do not exactly have a lot of space in which to put a cabinet. So its not like we could just go to The Depot and get one of those pre-fab plastic mini sheds to stick in our yard. (besides, those things are ugly as sin, amIright???)
Function over form Z was all... I could slap some plywood together...
Form over function Valerie was all... We could build a lovely little corner cabinet that would fit in that space and look adorable and we could have a cute little drink station for entertaining and run twinkle lights around it...
And we sat and looked at each other for a few quiet minutes, and then someone suggested, we should draw something so we know what the other person is talking about. So I pulled out the sketch book and we doodled for a while, and came up with some ideas, and when Z was at work that evening, I took some measurements, and drew up some plans. My dad called that evening, and I asked him if he thought we could build a little corner cabinet for our yard. And my Dad-- who is learning not to question my moments of genius inspiration (insert winky face)-- said, Draw a picture of what you want, and I will see if I can make it happen.
So I drew this:
 |
| Please don't make fun of me... drawing and engineering is not really in my skill set. Do you like the nice list I made of things we could put in the cabinet??? |
And then my dad, because he's one of those engineer types, took my simple drawing, and put it all into a CAD program and printed us out plans with measurements and angles and full color views from every angle. This thing was happening, and it was going to be over-engineered as well. :)
My dad Has never been known for his spelling and language skills-- he's a great engineer, who needs 'em?-- and when he was labeling the plans for our mini-shed, he spelled: S-H-E-A-D. When Z and I saw it, we thought it was funny, and started calling our project The Shead. My dad didn't like that we were making fun of his spelling-- but we assured him we were not trying to mock him and we found it endearing. We liked having a special name for our project!
Anywho... we headed to the Home Depot to pick up the supplies. This wasn't a cheap project-- but it was done the right way-- with all pressure treated wood so it would not rot out after one season. All our material: wood, screws, glue, and hardware, came to around $150. However, a similar in size and shape plastic shed was $159... so we're not too torn up about the cost.
Enough talk onto the building.
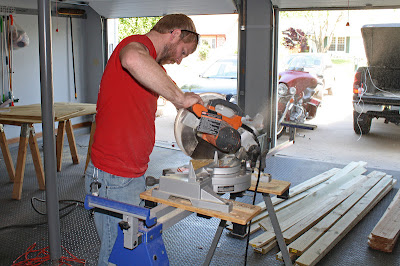
Mmm... my man and power tools... Sexy, no?
Zachary and my dad worked in my parent's garage to build it. And... Sam even helped!
Okay, so that picture was completely staged. Sam played inside with Grandma most of the day, but he did come out and watch his Daddy assemble the doors... and clutched a pencil for dear life while he did so. Of course Mama forced a photo opp. (Oh, come on! What was I supposed to do?!)
This is my dad working on the frame. Because it was a small space our cabinet needed to fit into, we decided a corner cabinet would be the best use of space, and the most aesthetically pleasing. But it was still small, so we opted to keep the back of the cabinet open so we wouldn't loose any space (we can shove our stuff all the way up against the brick wall-- no loss of space there!). This also would reduce the cost of material, and lighten the cabinet considerably. That puppy was all kinds of re-inforced and heavy as crap when it was all done.
It was evening by now, and the guys started hanging the doors... when we realized the hardware (hinges) we had purchased were not strong enough to hold up the doors. So sweaty and covered in sawdust we all loaded into the truck and went back to the Depot to get some bigger ones.
When we finally got back, they hung the doors and installed the hardware... and it looked great! But it was around 9:00 when we finished for the evening.
So we waited until day 2 to install the thing. But before we put it in, there were a few other things that needed to happen. Let me remind you of this-- the before pic looking from the back of the yard toward the house:
It's kinda hard to see in this picture, but next to the house it's really shady, and difficult to grow grass. On the one side we have that lovely airconditioning unit, and beside/behind that is a mud pit. The other side of the steps (where we were about to put The Shead) was not much better. So Z had the idea to do some landscaping... we put down some edging and mulch around the AC unit to cover those muddy areas, then mirrored that shape on the opposite side of the steps. Hopefully it will make the 'yard' look a little less patchy, and a little more balanced and appealing.
But our mulching and Shead installation kinda ripped out what little grass was hanging on in those corners... so we ended up laying down sod in that half of the yard. And because I am always running around without shoes and my husband and grossed out by all the mud and possible poo I may be tracking through when walking barefoot in the grass, we included a small stepping stone in the middle of the grassy patch in front of the Shead. I was deeply involved in the landscaping/mulching/sodding/stone laying process, so we have no process pictures, just this magical after:
Hey look! Mulch! Sod! Shead! Probably got there by elves or internet magic or something.
Anywho, here's what The Shead looks like empty... there are shelves on the left to store pillows, candles, tiki torch fuel, garden and grill tools, and other outside stuff. The tall open space on the right holds our rakes, shovel, pooper scooper, and other unsavory items Z wanted to remove from their former leaning-against-the-fence-by-the-grill-position. Here's what The Shead looks like filled:
And once that the doors are closed and latched that side of the house, and the filled completed Shead looks like...
AH! Lovely, beautiful, practical Shead... We love you. You look so very handsome in our backyard. I am so pleased!
And here, you can see the rakes and storage have been hidden from view bringing this side of the yard up to par with the rest of it.
And with the completion of that landscaping project, the building and installation of the Shead-- I declare Backyard Beautification complete! Yay! I could not be happier. with how things turned out.
Wanna see some before and afters? Yeah-- meeeeee too.
Before
After
 |
| Grass, Fence, Clothes Line, Herb Garden |
 | ||||
| Lighting |
Before:
After:
 |
| Lighting, Shed, Mulch, Sod, Step Stone |
Before:
After:
 | ||
| Lighting, Shed (storage), Fence, Grass |
I feel like this has been a long journey... but I am glad you followed along with us!
The only thing left to do to our yard is to throw a party to break it in!


very, very impressive. :-) now you've got me thinking how bad my back"yard" is!! haha.
ReplyDeletecongrats!
Oh, thank you, Lisa!
DeleteIt was worth it to put a little work into it... our house is so small, having a nice patio is like an extra room for entertaining. I am very pleased with the upgrade. :)
Very nice! You've inspired me to get my backyard in tip top shape!
ReplyDeleteThank you!
DeleteYou should do it-- it is very rewarding.
Awww, the staged photo of Zach and Sam is SO cute! And the yard looks good too. :) By the way, I've seen my share of engineering drawings, and yours is not half bad! I'm so glad you guys can have another "room" to hang out in that you can really enjoy.
ReplyDelete