What are you trying to find???

Monday, February 25, 2013

Just another Mani(c) Monday...

I hope you all are singing that song now... because it's going to be stuck in my head all day. UGH.

As promised... Mani(c) Monday, Part 2!
I shared with you a couple weeks ago about my new(ish) nail art hobby. I havn't been doing nails very long, so I am no expert. But I wanted to give you a few resources and show you some of my tricks and tips for nails and organization of all your stuff! As well as... more pictures of recent Manis! (Because whats the point of having fun nails if there is no one around to oooh and ahhh???)

So lets dive right in.
This is my big case where I keep all my polishes and nail accoutrements. I got it at Target with all their storage tubs and whatnot. It is the perfect height to hold polishes.
The bottom layer holds all my polishes. (Yup, those are metallic sharpies! I used them to create a look that I showed you in my last Mani(c) Monday post, but there is also a tutorial here, if you are interested in how/why to use them!)
The top section holds tools, remover, brushes... and everything else. Actually, here is a comprehensive list of all the things you see up there:
Nail clippers, Cuticle nippers, assorted files, orange wood cuticle sticks, cuticle oil, Cotton balls/cotton swabs/cotton rounds (the rounds are my preferred tool for polish removal, they hold up the best), polish remover, Acetone, nail glue, brushes, dotting tools, a shot glass (for acetone), a pen, swatch book (not pictured), and flexible plastic boards (not pictured).
They all fit in there nicely, the lid (with a handle) snaps closed and it's all comtained and can be stashed away. Although, mine comes out frequently enough, recently it's been stashed on the unused kitchen chair.

Mermaid nails! Can you see the mermaid scales?
OPI: Passion, Zoya:Ivanka
When Amy first turned me on to nail art, I never wore polish because I didn't know how to polish my own nails, and found it too expensive to get professional regular manicures. I thought I was not good at painting-- and maybe I could do my left hand, but definitely not my right. She told me with practice you would see quick improvement... and let me in on this secret:
**When painting your own nails, start with your dominant hand. (I am right handed, so I paint the right one first) Wait for it to dry completely before moving on to your non-dominant hand (which should be much easier!) You will be amazed, just that little switch will make a huge difference in your polishing skills!

Zoya: Jana with chevron accent

Next she pointed me toward the god old internet where there are countless blogs and beauty websites with tips and tutorials on painting nails. Here's a nice easy (slow... long?) video tutorial: Painting your nails like a pro!
I also love this graphic showing how to polish a nail:

...and if you click all the way through to the originating sight, she explains the graphic in depth, as well as a great tutorial/explanation of tip wrapping!

Peacock Nails! SH: Black and Blue
My sister checks out my manis and goes on about how creative I am... not really. When I want a new look, I pull up a pinterest search and see if something inspires me. You can check out my Nail Muse Board on pinterest... an ever growing board with lots of fun ideas, lots of them with tutorials on how to make it happen! So helpful!

SH: Trouble Maker

You can acquire a few pretty inexpensive tools that will make nail art so much easier, and open up a whole creative world for you! I have this brush set, and this dotting tool set. For under $10 you can have both and a lot of fun with new nail art options!

Bubble Mani
essie: Beyond Cozy, NicoleOPI: It's all about Glam, China Glaze: Flyin' High
There's this problem you might experience when you start polishing, and it happens like this: One day you are a normal sane happy person who can trot past the nail care section in any store without and second glance... then you start polishing all your nails and all of a sudden you are a crazed lady who bursts into the store running to the nail care like I WANT ALL THE COLORS!!!!
No. For real. That happens. It's a problem.
And then You are all, I have so many colors??? I don't even know what colors I have anymore! And then you need a way to keep track...
When a new color enters my life, it goes through this quick simple cataloging process, ready?
I created this swatch book (that you can have, you're welcome!) by printing off the sheets, cutting them in half, punching a hole in the corner and putting them on a ring.
Each new color gets painted in a swatch box under the correct color category, and then I write the brand and name below.
Next I paint a tiny swatch on a label sheet. After it dries, I use a hole punch to punch it out, then peel the back off the color sticker I just made, and stick it to the top of the bottle. You may have noticed in the pictures (way at the top) that each of my bottles has a color dot on top? Easier to find what polish you are looking for when you staring at a big tub from the top.
 So go print yourself one... it honestly helps with decision making! :)

Valentine's Mani!
essie: forever yummy
Another problem I had was no 'safe' location to do my nails. I did them on my husbands desk and took the wood finish off with polish remover. I did them on the kitchen table, and spilled gold polish. I tried to put paper towels over my work surface, but they didn't protect against much. And then I finally thought of the perfect soloution!
These are a couple of those flexible cutting mats (I got a pack of 4 at Target for $6, but you can get them anywhere...) These were the perfect soloution! They are cheap, easy to store (they were the perfect size to fit right inside my case)  and they contain my mess... I don't have to worry about acetone soaked cotton ruining my table (I know, obviously my table is in rough shape anyway, but thats a project for another day), or paint drips... it also gives me a place to drop polish for art, or try out techniques or colors together before putting it on the nail.
These are a mess right now (I purposefully left them that way so you could see they are effective) but the polish mess wipes off easily with a little remover for a nice clean work space!

Red Carpet Nails for the Oscars last night!
China Glaze: Passion, Zoya: Raven, L'OREAL: Caught Red-Handed


 Another thing that can prove to be problematic... broken nails. You know that you've grown yours out before, only to have one beautiful one break/crack at the base. You don't have to nub them all! There is hope! I have used this method to repair many broken nails... works great! In the tutorial they say to use 'stretchy fabric' but I use the gauze from a tea-bag, or coffee filter. Works great! Save the Nails!

Disco Barbie Nails! (as named by my sister)
OPI: Suzi's Hungary Again, essie:Beyond cozy

One more thing...
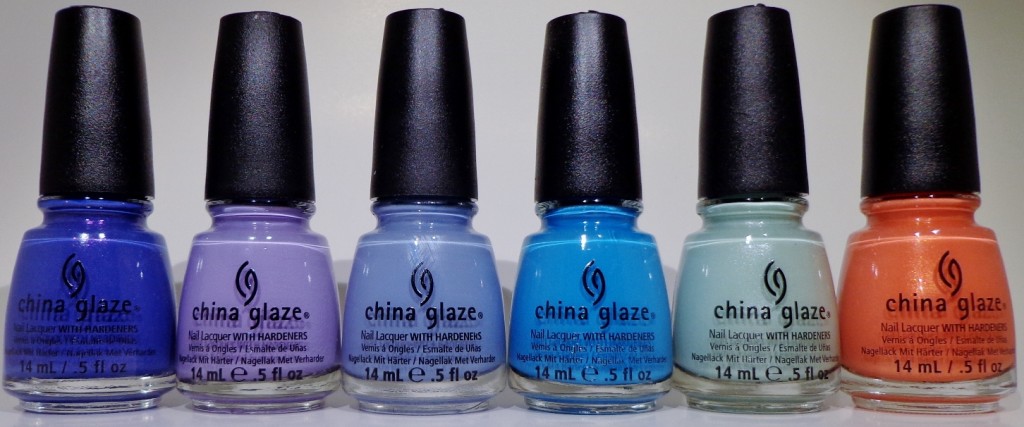
Cynthia over at Of Life and Laquer is hosting a giveaway of the China Glaze Avant Garden collection. It's pretty.
 Yes? Go HERE to enter, and check out her site and say hey, and/or Thanks! Because she's way cool for doing a giveaway of pretty stuff...

So this is a long enough post... but hopefully it gave you some tips and resources to venture into the world of nails polish and art! It's truly a relaxing and fun new hobby for me.
Do you have any tips, tricks, polish suggestions, pictures, or techniques to share? I'd love to hear about whats going on your nails!

Thursday, February 14, 2013

Happy Valentine's Day


Happy Valentine's Day, from Sam.
The handsomest little bachelor ever. Eat your heart out, ladies.

Okay, so this valentine is something that has been floating around in my mind for a while... and it didn't turn out exactly as I imagined it, but it is still cute as crap. When Sam was about 3 months old, I found this little tux at a second hand store on a 50% off day. I think I spent something like $5 on the tux pants and jacket, a vest and tie. I didn't know if he would ever have an occasion to wear it, but it was worth it to have on hand, just in case. About a year later, it finally fits him and we didn't have a real occasion for it-- so why not make one?
I have a friend who is a photographer with beautiful backdrops and whatnot who offered to take the pics for me, but we just couldn't get the schedules to work out and make it happen. I couldn't shake this image of the little guy in this little tux clutching a red rose... so I made it happen.
We used the super classy white sheet (that I didn't even iron) (and really should have) (oops) method... and Sam took one look at that set up and laughed in my face before rolling all over the place and folding and wrinkling the crap out of it. So um... photoshop?
...where my skills leave something to be desired. But in the end it was good enough to send to the grandparents (but lets not lie, the grandparents would be excited about scribbles on the back of a McDonalds receipt.) and I thought cute enough (the boy, not the photoshopping) I had to share it with all of you!
The best part though, may have been the outtakes. If you follow me on twitter (@1sassyhousewife) You already saw some of these, but I thought they were too much fun not to share. All of these are SOOC, no editing. This is photoshoot magic in all it's raw and untouched glory!
Swinging that thing like a sword, I tell you!
And I love the following progression of pictures... check it:
Oh, Nothing. Just cute as crap, and snuggling a rose, NBD.

Still adorable... still adorable...
YAAARRRGH! EAT IT!


You need to know that he growled as he bit into the rose.
Then he scattered the petals and draped himself appealingly across them and made his come hither face. Just kidding. Sort of.
You might also have noted that my son is wearing navy blue socks with his black tux. That's because we are classy.  Thank you for noticing. Originally I was going to do the pics in black and white so it wouldn't matter. But then I didn't and it did. So... yeah.

Anyway, made my one year old's valentine spoofing one of the trashiest shows on television, but I feel at peace with that decision. haha.
What did your valentines look like this year? Put links and pictures in my comments so I can see them because I am nosy like that, okay?
Hope you get to spend the day with all the people you love!
Happy Valentine's Day... MWAH!

Tuesday, February 12, 2013

Some Handmade Valentines

A few weeks ago, Amy Lee and I decided it was time for a glitter fest again. This time we decided to glitter bomb my house and make some valentines. Actually, through some contact at her work she had heard about a program that was distributing handmade valentines to the kiddos in Children's Mercy Hospital. And not that we needed a cause to glitterbomb one of our houses in a crafting frenzy... but we thought this sounded like a GREAT cause. So we invited a few friends, busted out the construction paper, glitter glue and heart stickers, and got together for a Sunday Crafternoon.
Dude, check out the MESS of papers on that table. We were into it. (Also Winston cameoed in this picture... it's like Where's Waldo? Can you find him?)
Here are the Valentines I made... I guess I thought I had taken pictures of everyone's? But my camera ate those or something? So here are mine:
Most of those cards are stacked several deep, I know it doesn't look like a a ton... but we each churned out around 20 valentines. I was trying my hardest to make some Male and gender nuetral valentines-- as valentines with their red and pick and hearts can get rather effeminate fast. Hence the dinosaur and dump trucks.
 Actually, the dump trucks were totally my fav. I hand cut all the pieces which made them a smidge time-consuming, but if you were mass-producing them (Say for a whole class of kiddos?) You could easily use a truck shape on a cricut or silhouette type cutter and it would go pretty fast. Topped them off with some sparkly hearts... and I think they are adorable and fun for boys and girls!
Meanwhile, Melissa was using a circle punch and making adorable 'leggo' valentines (I'll never 'leggo' of you, Valentine!) and cute cute elephants with big floppy heart ears, (You're unforgettable!). And Amy was churning out every animal on the planet... but the favorite were her alligator valentines. Maybe one of them has pictures I can share? Ladies?
Anyhow... we had a fun afternoon putting these together, and I think we sent more than 50 valentines to give to kiddos. So I hope they make some kiddos smile on Valentine's day.
Have you made any valentines or gifts this year? I'd love to see what you put together!

Thursday, February 7, 2013

OSH revisited: Outta Storage Space Soloution!

I am not a big time blogger, or a blogger for money, so I don't check my stats page frequently. I basically started blogging for friends and family to check out my projects (Hi Mom!) but since then, other people have stumbled upon  this blog for different reasons. (The Swingin' post got 22,000 hits last month. Whoa! Thanks, Pinterest!) And occasionally I look at the stats page out of curiosity of what ya'll are looking at.
The other day after revewing those stats, I thought some of those popular posts could use an update, revisit, revision, etc. SO I thought I might start a mini-series where I would revisit some of my most popular posts and revise or flesh them out where needed. Hence the title OSH (One Sassy Housewife) Revisited! Look for more OSH Revisited posts over the next month or so!

Did you know one of my top 3 most viewed posts is this one right here? This little post where I asked what to do about picture storage on my blog. According to the stats page it is most often reached from google searches... maybe other bloggers have the same problem? I don't know.
Well, there are still pics on my blog, which obviously means I found a soloution.  It's not profound, or highly technical... but I thought it was time to share with those who might run into the same problem.
The original issue was that the free photo storage that Blogger offers had all been used up. Blogger would no longer allow me to upload photos until I deleted a few. Well, I didn't want to do that because it would remove them from my blog as well.
Part of my problem was that I had been using full size images on my blog since I started... which filled up that available space quickly. So I learned how to shrink my photo size before uploading. Most photo editing software should have some kind of 'save for web' or 'shrink for web' function. I use Photoshop elements 'save for web function'. This tool just goes in and compresses and simplifies the information-- so to speak. There is often very little difference noticable difference in the photo quality and appearance.
This photo, for instance, before 'saving for web' used up 30.5M of space. After shrinking, 1.5M. Quite a bit of difference. I also reduce the size of pictures for my blog by pixel width. (I use 500 for horizontal, and 350 for vertical pics) In Elements, you can change the pixel width at the same time as saving for web. So using the same pic above, it started as 4001x2667 pixels. I just reduced the width (make sure you have locked proportions) to 500 and it auto reduced height as well. So now it is 500x333, which I find is just the right size for my blog. So after saving for web and reducing size by pixels, the photo that originally took up 30.5M of space now takes 41.95K. 
Quite a bit of space saved there!
So if I had been saving my pics that way from the start, It is unlikely I would have run out of the 1GB (I think?) of free storage space Blogger offers. ALSO... it would have made things easier for you, as pictures and pages would load faster and use less data, etc. In theory I could (should?) go back and reduce the size of all those photos, which would free up storage space. However, that would be extremely time consuming and tedious to find, shrink, and replace all those pics, then repost everything... no thank you. I needed a different soloution.
So I talked with Z about it and he suggested I find another free site to store my pics. Because blogger gives you the option of uploading pics from another URL. So I started loading my (edited and saved for web pics) to SkyDrive which offered me free online storage and access to photos. Now when I am ready to insert a picture I just open up skydrive, copy the file location, and paste it in the picture URL box on blogger. Simple.
The only glitch is you need to make sure you either load pics into the 'public' folder, of set the privacy to 'public' for your pics, otherwise blogger will not be able to access and display them.
So thats my totally non-technical explanation for my photo storage solution on blogger.
I know that was a lot of words, and I hope most of it made sense or can help someone like me-- who isn't REALLY tech or blog savvy but ran into that problem, and needs a soloution.
If you have more recommendations, or better solutions or ideas, please share in the comments section! Let me know hoe you solved or avoided this problem! And thanks for reading, friends!

Monday, February 4, 2013

2012 Family Pictures


A few months ago we had family pictures taken.
My friend Jacie of Dance With Me Photography took them for us. Jacie does mostly newborn and children photography... but she did such a great job with Sam's NB photos that I coerced her into taking some family shots for us. Just as expected, she did a beautiful job once again, and I LOVE the images she captured.
Sam was happy and cooperative, despite it being cold and so windy.
(Full disclosure, this picture was taken right before he found some goose poop and tried to sample it!)
Photographers love Z because he is an awesome and photogenic Daddy. I think this picture is so sweet.
This is a favorite! Love this little man so much!
Another Favorite... my smoochy little Sam-- he knows he's the star of this photoshoot. Look at that star power!
My only regret is not getting any shots of just Z and I (My fault!) I didn't think about it at the time... but as I was going through the final shots later, I so wished I had. 
Regardless, I love these beautiful shots of my family-- taken in our favorite park, literally, the day before they tore it up to build some big building in it's place. So sad!
Jacie did a great job. You can visit her FB page here if you want to see some of her other work, (Yep, that's baby Sam in the header!) but (sad for you) she is currently taking a year long hiatus to focus some time on the ever changing needs of her growing family. Sad for her clients, but so SO good for her family! Good for you Jacie! Thank you again for your beautiful work.

And... I know we are well past Christmas, but I went MIA for a season, so here is the Pogemiller 2012 Christmas Card featuring one of our beautiful family photos...
Wishing you a lovely holiday and merry and bright new year!


Monday, January 28, 2013

Mani(c) Monday

I... feel like I should re-introduce myself.
Hi. I am Valerie, the Sassy Housewife, wife of Z and mama to Sam. Creative brain, space cadet, sewist, quilter, painter, DIYer, lover of marshmallows, and author of this blog that has been dead for the past couple months. 

It's nice to (re)meet you. It's nice to be back.
Some of my kind readers and dear friends have been asking me whats going on? And I don't know, really. I mean the holidays hit me hard. I feel like they were a coma that I haven't fully awakened from yet. I know it's the end of January and everyone else in the world dealt with it and moved on, but I'm not quite there yet. So please be patient with me. I want to get back in the swing of blogging... I need to. I enjoy it, and love the creative and brain outlet it offers me, but sometimes it feels big and overwhelming and I just need to step out for a bit. So I stepped out.
But now I am back.
With no promises of regularity.
So there's that
.


Here's something fun to get us started on an unseasonably warm Monday. (I mean, I know I live in KS, but 66 degrees in January is weird.) It's crazy.
My good friend Amy Lee recently converted me to The Fancy Side. In Amy's words, "The Fancy side is like the dark side, but with glitter and pretty stuff." She is mostly referring to her new nail polish/nail art obsession to which I have also been sucked in. Which is actually pretty significant if you know me and my history with polish... I have mostly always been terrified of it. I would even go so far as to say I was anti-polish. I mean, take care of your nails, a nice manicure doesn't hurt anyone, but I never really liked color. Until recently. And I don't even really know what it was that changed my mind. I just suddenly wanted fancy, fun fingernails.
My very first fancy side mani was done at Amy's house after a few glasses of Sangria, So I feel like I can confidently blame either Amy or the Sangria or both for this particular life change.
Sparkle fade
essie: Beyond Cozy
I have started simple. Nothing too outrageous while my collection of polishes and my obsession is slowly growing... Z likes the 'sparkle fade' and compared it to drum set finishes. It's his fav.
Golden and braided
China Glaze: Passion
My sister got me this super shiny gold for christmas and I got fancy using this video tutorial to 'braid' an accent nail. Fun and festive, right?
On NYE Amy created Champagne nails for me with a subtle gold and tiny bubbles... and would you believe I never even took a picture? They were so amazing. We'll have to make it happen again sometime.


OPI: Sprung
Then I spent a couple weeks trying to cover a nail that caught a zipper and broke... like halfway down the nail bed. It was not pretty. And it hurt like crap. Which is why my ring finger nail is freakishly short and chunky here from the repair wraps I kept putting on it.
This color may be my new favorite... it's coppery, gold, and pink all at the same time. It's a bit more sparkly than a metallic but not quite a microglitter. It's amazing. And shimmery. And definitely Fancy Side bait.
OPI Liquid Sand: Can't Let Go
 This 'Liquid Sand' color is a textured matte finish with little glinty things in it. And you all know how I'm a whore for texture, so I love it. And it's purple which is my favorite color, so I double love it. Nothing fancy about this one, because the polish is already extra fancy.
essie: Sand Tropez
and a Sharpie!

This shade is my fav nude right now. I like neutrals with a bit of something to make them pop. This pop is courtesy of Sharpie! I used the 'bronze' one in the method described here.
Eyelet lace
OPI: Hawaiian Orchid

This one was created using dotting tools... super simple. But I really thought it was sweet and cute, maybe for valentine's day? Then after staring at it for a few days it started to look like octopus tentacles to me? Which freaked me out so I had to take it off. (maybe I have just inhaled too much acetone fumes...?!)

I have actually really enjoyed doing my nails. It's my little naptime guilty pleasure. I sit down and relax fox about 15 minutes and do may nails. It's kinda nice. It's a break from the crazy. And anyone who has (or has ever had) a toddler knows how crazy and manic a mama can feel if she doesn't take the time to relax even for just a few tiny moments each day.
I feel like I am getting better at my nails... especially at that dominant hand! So hard to master. For that reason I havn't really done anything toooooooo crazy with my nails, but I am having fun learning. You should check out some of the nails Amy Lee has done... her's are crazy fun!
I don't know if I can commit to making this a regular installment on the blog... but I do have a few things I still want to show you about my nails. Some tips and tools for beginners and junk that I use, etc. Plus I'll want to show off my manicures as I get better and more adventurous. What do you think, anyone else interested in Mani mondays?

Friday, December 21, 2012

The Only One You Need

***Did you know... You can follow One Sassy Housewife on facebook and twitter now?!?! So if you find yourself wondering what I'm doing (probably taking pictures of my son) or thinking (probably something about marshmallows) at any given moment, you can stalk me in one or both of those places and find out. Hooray!

You know what I love about cookies? They are a bakery item I can't seem to mess up! Cakes, breads, brownies... all seem to go wrong for me... but cookies are simple and versatile. Especially when you find the right recipe. The right basic recipe can be tweaked for a different cookie and success every time... which is awesome!
This basic chocolate chip cookie recipe came from the America Cooks cookbook (yeah you read that price right-- no longer in print but highly sought after cookbook, it has the basic recipe for everything your grandma used to make...) which is another family heirloom kind of thing... that my parents stalked Ebay to find for me when I started cooking. (Similar story to the magnalite!)
 This particular recipe makes a small-ish size batch (about 16-20 cookies, depending on how big you like 'em.) of perfect crispy, chewy cookies. We like crispy chewy. But if you are a cake-y kind of cookie person, it's easy to tweak. Then when you are ready, through in your yummy bits of choice: Chocolate chips, M&Ms, nuts, crushed peppermints, dried fruit (craisins!)... so many yummy options.
The cookies pictured have white chocolate chips and macadamia nuts.
Another thing I love about this recipe, is it makes a smaller batch, so you don't have 4 dozen cookies when you just wanted 2 cookies for a snack... but it also doubles easily if you need cookies for a crowd. OR it freezes well if you want to make a double batch and freeze half for a rainy day. I recommend using your cookie scoop to make the individual balls, then throwing them in the freezer for about 15 minutes to flash freeze them, before throwing them in a ziploc bag (or other airtight container) for storage. You can keep them in your freezer for up to a month that way. When you are ready to bake (maybe just 1 or 2... or 8 or 12 at a time) just pull them out of the freezer and line them up on your tray while the oven is preheating, then bake and enjoy as normal.
(another thing... I like to bake my cookies on parchment paper... because, well you can see what my cookie sheet looks like. Is everyone's cookie sheet grubby looking? I kinda feel like that's a universal thing. Anyway... parchment paper! Cookies don't stick, don't burn as easily, and clean up is as simple as throwing away a piece of paper. Awesome.)
So are you ready for it? My secret cookie recipe... the only cookie recipe you need:

Chocolate Chippers

1/2 cup shortening
1/2 cup granulated sugar
1/4 cup brown sugar
1 egg
1 teaspoon vanilla
1 cup presifted flour
1/2 teaspoon salt
1/2 teaspoon baking soda
8 oz semi-sweet chocolate pieces

Preheat oven to 375 degrees F. Grease baking sheets (or line with parchment).
Cream shortening, sugars, egg, and vanilla in a mixing bowl.
Sift together flour, salt, and baking soda. Stir into creamed mixture, blending well. Add chocolate/nuts/candy.
Drop dough by tablespoons (I use a cookie scoop), two inches apart on baking sheet.
Bake in preheated oven for 10-12 minutes. Remove from heat at once.

*For cake-y chewy cookies, replace half the shortening with butter. For soft cake-y cookies replace all the shortening with butter.
*Use white, milk, dark, or mini-chocolate chips (or a combination!) in place of semi sweet chips! Also try M&M's, Reeces Pieces, or other crushed candies/candybars.
*If adding nuts, use only 6 oz chocolate, and 1/2 cup of nuts
*baking time does vary slightly based on what you added, just keep an eye on your oven for that first batch...

Now make yourself some hot cocoa and a batch of yummy cookies and share with your family this holiday! Enjoy!