On Monday, we had our weekly girl's night, and it was my Good friend A's turn to make dinner. She delivered with a yummy thick potato soup. It was perfect for an evening just trying to put a bit of a chill in the air-- promise that fall will be here soon! I enjoyed it so much, I asked for the recipe, and it landed in my inbox yesterday. I plan to make it for dinner tonight... but thought I would share first so that you could do the same! Happy eating! YUM.
Irish Potato Soup
¼ C. Butter
2 Large Onions, finely chopped
1½ lbs Potatoes, peeled & diced (golden potatoes recommended)
Salt and Pepper
7 C. Chicken Stock
Fresh Chives for garnish
Melt the butter in a large pan. Add the onions, stirring to coat with butter. Cover and leave to sweat over low heat.
Add the potatoes, stirring to coat with butter. Salt and pepper to taste. Continue cooking, without browning, over low heat for 10 min.
Add chicken stock. Bring to a boil then simmer, uncovered for 20-30 minutes or until vegetables are tender.
Puree the soup in small batches in a food processor or blender until smooth. Serve hot with fresh chives to garnish.
(We like to add crumbled bacon and sour cream as well. I also thought a little more butter flavor would be good. And of course, good bread for dipping is a must!)
Enjoy : )
For Girls’ Night I doubled the potatoes and butter, but not the onions (they were pretty large onions, though). I also did not double the broth, just used enough to cover the veggies.

Thursday, September 16, 2010


Tuesday, September 14, 2010
WE MADE THIS: Flower girl dress!
I recently got married... and we DIYed just about everything. (before you go getting impressed, let me temper that outrageous statement by pointing out that is was one of the most simple, understated weddings I have personally ever attended... but it was still beautiful, and thats why is worked.)
One of the many things that gave us sticker shock during wedding planning was flower girl dresses ("$200 for an 18 mos girl's dress??? Oh, HECK NO! There is not even an entire yard of fabric in that thing!") My mother is a very talented seamstress... so I started collecting pictures and handed them over to her. Here are my inspiration pics:


My mama sewed dresses for my sister and I when we were little, so I am pretty sure she was happy to take on this project. She confidently stated that we could make this happen.... and so armed with 40% off coupons we traveled to Hobby Lobby and bought a pattern and a couple yards of fabric to make a teeny tiny dress for our sassy little flower girl.
 |
| My Fabulous mama cutting out little dress pieces. |
 |
I may look as though I am enjoying myself here... but i was pretty unhappy about gathering that stupid skirt! I am not nearly the seamstress my mother is! |
 |
| Naked dress |
 |
| Completed dress. LOVE IT! I just get a kick out of the giant size flower... it was so sweet. :) |
 |
Like many 18 mo children... Charlotte wasn't thrilled about staying still for pictures... so all the pics we have of her are action shots! :) Loved the way it turned out and the precious little girl who wore it! (And for those of you wanting to know... Total Cost for this custom made dress: $19.00) Yay! |
Tuesday, September 7, 2010
HELP ME!
So my Husband made changes to the blog layout... and now the title is not centered. We don't know how to center it. In some browsers it doesn't show the whole title image as 'One Sassy Housewife' Some of you might only be seeing 'One Sassy House'
Anyone know how to fix that? We're stumped!
EDIT: Well, now I think I got the whole thing to show up, but it's all fuzzy. Blah. This is why I'm crafty... and not computer-y. I don't know how this machine operates. Get me my sewing machine!
Anyone know how to fix that? We're stumped!
EDIT: Well, now I think I got the whole thing to show up, but it's all fuzzy. Blah. This is why I'm crafty... and not computer-y. I don't know how this machine operates. Get me my sewing machine!
Monday, September 6, 2010
LEARN TO DO THIS: Re-finish a nightstand!
Happy Labor Day! I've been 'laboring' (I'm terribly witty...) on this one for a couple weeks now... finally finished it up, put it together and in place today...
When we bought our new bedroom set after we got married, we decided not to spring the extra $150 for the matching night stand. Would have been nice... but Z kinda had that money earmarked for a new Wii... soooo... we did without. We actually had been using an wooden tv tray for the alarm clock and what not that goes on a nightstand while I tried to find a better alternative.
Enter craigslist... where I found THIS charming little thing for $20.
 The person I bought it from said this of her antique night stand, (and I quote) "It needs re-finished, but it's really sturdy." By the time I got the thing to my car, the drawer front had come off, and a piece on the front was wobbling conspicuously. Sturdy my arse! Oh well, I was going to have to take it all apart to stain it anyhow. It was pretty dinged up and was this nasty orange-ish color. gross. And had this greenish tarnished brass pull-- knew that had to go.
OK, so I got out my husbands little 'mouse' sander and sanded away. I used a paint/varnish stripper on the trim/detailing. All those little grooves were a pain in my bum! Here it is naked:


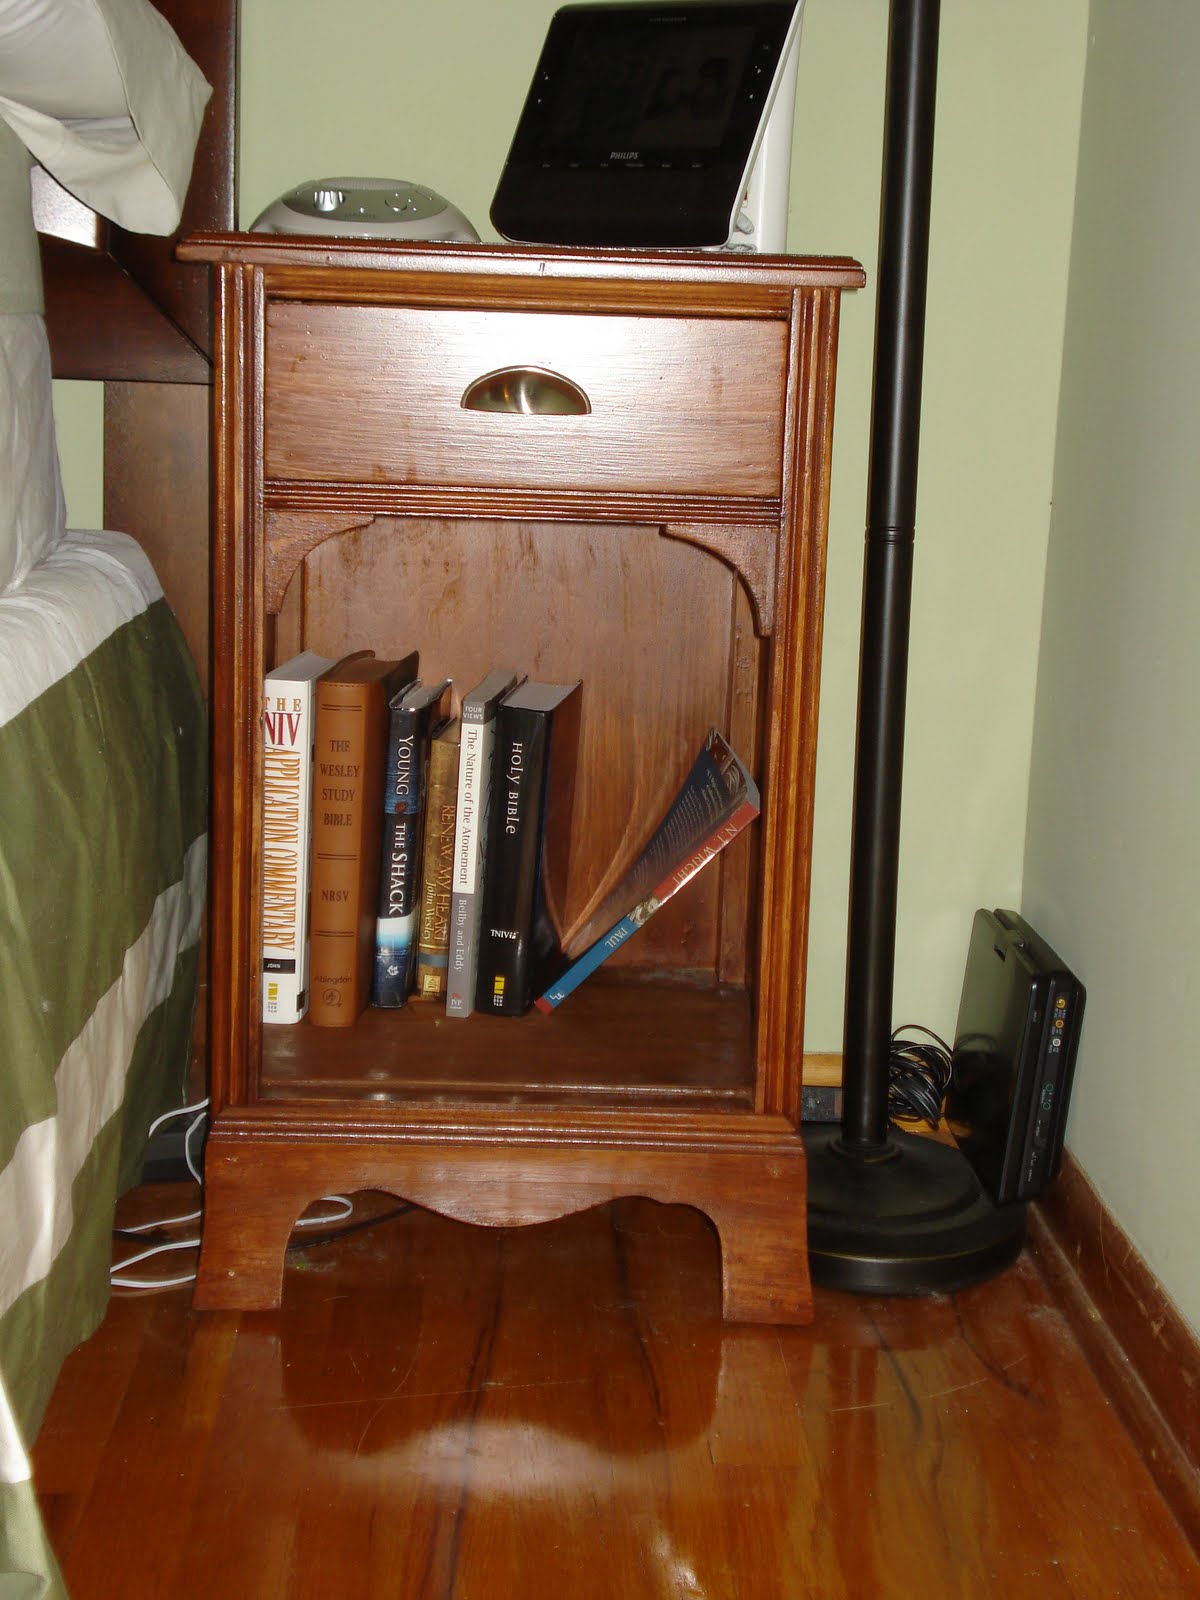
Gross, right? Um, here's how it looks with new nightstand in place. MUCH better! Much more organization! Much more happy! (although the bed is still not made, don't judge me. The sheets are in the wash...)
 Good project, and good sense of accomplishment! Hooray!
When we bought our new bedroom set after we got married, we decided not to spring the extra $150 for the matching night stand. Would have been nice... but Z kinda had that money earmarked for a new Wii... soooo... we did without. We actually had been using an wooden tv tray for the alarm clock and what not that goes on a nightstand while I tried to find a better alternative.
Enter craigslist... where I found THIS charming little thing for $20.

OK, so I got out my husbands little 'mouse' sander and sanded away. I used a paint/varnish stripper on the trim/detailing. All those little grooves were a pain in my bum! Here it is naked:

And then I put on 3 coats of walnut stain/varnish, (sanding between each coat, what a pain...) and glued and nailed the whole thing back together to sturdiness again! And we changed that yucky pull to a much prettier brushed nickle that matches out bedroom set... and...

SO. MUCH. BETTER.
Now, it was my first time refinishing something... so i am sure you can pick out the blemishes if you wanna try real hard... you can find plenty of stuff like this:

Sigh. Imperfections.
But that's only if you are trying to find fault, because for the most part it looks great! I am pleased!
Now all that's left to do is put is in place... so it can replace this mess: (honestly this is the reason I try to stay away from that side of the room, it is scary and kinda gross. I need to teach Z about trashcans and stacking things. anywho...)
 |
| BEFORE... |
Sunday, September 5, 2010
Changin' it up!
My husband told me my blog looked like crap. Well, it kinda did. But I just barely know how to operate a computer... so it was pretty good for me. Anyway, he has shown me how to do a few things... and redid my blog title, and now we are trying to decide on a blog layout/background we can both be happy with! HA! I am currently a big fan of the sparkles... it might change... I know thats annoying, I'm sorry. Bear with me!
DO THIS: Love a Farmer(s Market)

The picture above is what I love very most about summer.
This beautiful caprese salad is made with heirloom tomatoes (purple Cherokee, great white, and red pear) purchased from the local farmers market. There is this guy there that now knows me as a 'regular' (I know him as tomato guy) and every week I show up and talk to him about tomatoes. I have never in my life met someone so passionate about tomatoes... so I thoroughly enjoy our conversations. I bring home my spoils and make ridiculously indulgent dishes from the yummy fresh foods I bring home.
As well as the spoils I have collected from my tomato guy... I have brought home from my local market this year: Peaches, sweet corn, black berries, blue berries, raw honey, homemade jams, home made specialty pastas, zucchini, watermelon. Also at our farmers market they have people selling everything from plums to peppers, cucumbers to home made bread, roasted coffee, flowers, and barbecue!
Here are some tips I have learned about making the most of your trip to the farmer's market:
1) Carry Cash: This is the only form of payment most vendors will accept. Don't show up with your credit card... you will have no luck.
2) When to arrive: Come early (when they open) if you want the best selection, and late (before closing) if you want the best deals. A lot of times vendors will cut prices in the last hour to get rid of the stuff they have.
3) Case the joint: Take a lap around to look at everything available before you blow your whole budget on the beautiful berries at the first stand... only to find tomatoes you can't live without, but now have no money for at the next stand. On this first trip make a mental shopping list for your next run through.
4) Ask questions and make friends! Just like my tomato guy-- the farmers whole sell their products are passionate about what they do, and what they sell. Ask questions about the produce you are purchasing ripeness, uses, varieties, or even the farmer's preference.(What is this? How is it different from that one? What's the best way to prepare this? What do you recommend for this dish? Which is the best one here?) You can learn a lot about varieties of produce-- I previously assumed a tomato was a tomato... but oh have I ever been corrected!
Also, if you don't see something you want... ask about it! Often I have discovered that farmers may keep extras, specialties, or seconds set aside, just for people who ask about it. Oooorrr... if you make good friends sometimes they will set it aside for you the next week. YES! That's amazing, makes you feel totally VIP.
5) Take seconds! Often times vendors will have 'seconds' that you can purchase for half or less... They taste just as good, just aren't as pretty. But if you are making tomato sauce or jam or the like... What does it matter? Cheap and wonderful. perfect!
Most farmers markets run through the end of September, so you still have a few weeks to seek out the local ones this season... and I highly encourage you to do so! Besides the *YUMMY* benefits, it's good for your wallet, good for the economy, and the environment to buy fresh local stuff... plus, I think it's pretty fun! So enjoy! (I hope you find a Tomato Guy!)
Wednesday, September 1, 2010
DON'T DO THIS: Project FAIL
In the spirit of full disclosure... I feel as though I should blog about today's fail.
It started as a brilliant organizational plan. I was organizing my 'creative space' (the corner in the dark messy basement where I pile my crap) and adding a shelf and some other great things... I have these little canvas basket things... that were inherited (well, left in the house by the previous owners) and the fit perfectly on my shelf. Cool. But they were... um... yucky. Spotted and dirty from toiletries and dirty hands grabbing the little pulls on the front. But I carefully inspected them and established the canvas /plastic combination would survive some spot cleaning and a trip through the washing machine with bleach to well, just make me feel better about using someone else's thing.
Spot cleaning... successful. No indication of what was to come.
Popped them in the washing machine with bleach to clean those babies up... as it turns out the sturdy side I determined must be thin plastic... was actually thin cardboard. Thin cardboard that disintegrated and went everywhere... so when I opened the washing machine to find my clean canvas buckets... POW soggy cardboard bits everywhere.
What an absolute MESS.
I was so disappointed I wanted to cry. No clean canvas buckets... no extra organization in my space... and no free time to enjoy my organized space tonight... because I am cleaning up soggy cardboard tonight. (SIGH)
I took no pictures. Okay, maybe I did... but you will not see them, because it is a tragedy.
It started as a brilliant organizational plan. I was organizing my 'creative space' (the corner in the dark messy basement where I pile my crap) and adding a shelf and some other great things... I have these little canvas basket things... that were inherited (well, left in the house by the previous owners) and the fit perfectly on my shelf. Cool. But they were... um... yucky. Spotted and dirty from toiletries and dirty hands grabbing the little pulls on the front. But I carefully inspected them and established the canvas /plastic combination would survive some spot cleaning and a trip through the washing machine with bleach to well, just make me feel better about using someone else's thing.
Spot cleaning... successful. No indication of what was to come.
Popped them in the washing machine with bleach to clean those babies up... as it turns out the sturdy side I determined must be thin plastic... was actually thin cardboard. Thin cardboard that disintegrated and went everywhere... so when I opened the washing machine to find my clean canvas buckets... POW soggy cardboard bits everywhere.
I was so disappointed I wanted to cry. No clean canvas buckets... no extra organization in my space... and no free time to enjoy my organized space tonight... because I am cleaning up soggy cardboard tonight. (SIGH)
I took no pictures. Okay, maybe I did... but you will not see them, because it is a tragedy.
Subscribe to:
Posts (Atom)